Okta SAML Setup
Background
SAML is a service that allows organizations to manage authentication across in-house and external web/mobile apps and services. This document discusses the installation steps necessary to integrate Brilliant Authentication via SAML SSO. Note: if your Single Sign-On provider is Azure, there is a separate guide covering integrating with Azure SAML SSO.
Through the Brilliant/SAML SSO/IDP integration, the following steps are necessary:
Create the SAML SSO Application
Create a user account (register) at brilliantmade.com using your company email address
Exchange integration information between your SAML SSO application and Brilliant SAML integration settings for your company
Test that login is successful
SAML Application Setup
Before we begin, there are some assumptions being made. One, that you are a Company Manager and either you, or someone you are working closely with inside of your company is an SAML Administrator. Two, you have registered with Brilliant using your company email address.
After the above criteria has been established, the steps involved in setting up the SAML SSO application include:
Login to Brilliant using your email address and password
Navigate into your Company -> Automations -> SAML Integration General Settings
In a separate browser tab or window, login to your SAML provider
Create a new SAML application, choosing SAML 2.0
Give your new application a name, for example “Brilliant SSO”
Follow the instructions below to complete your integration
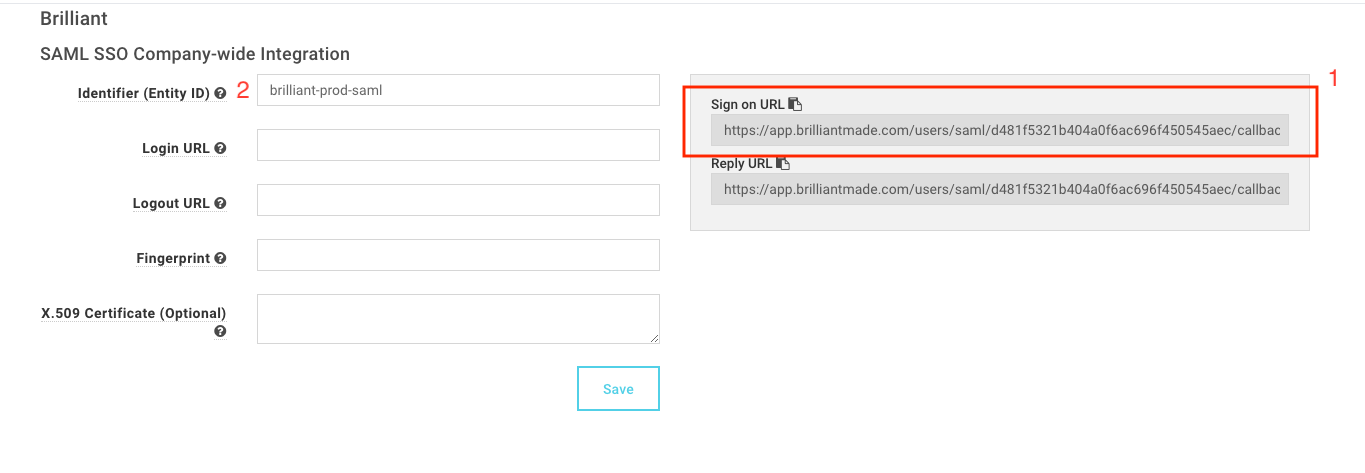
In the SAML Integration General Settings page in Brilliant (Figure 1):
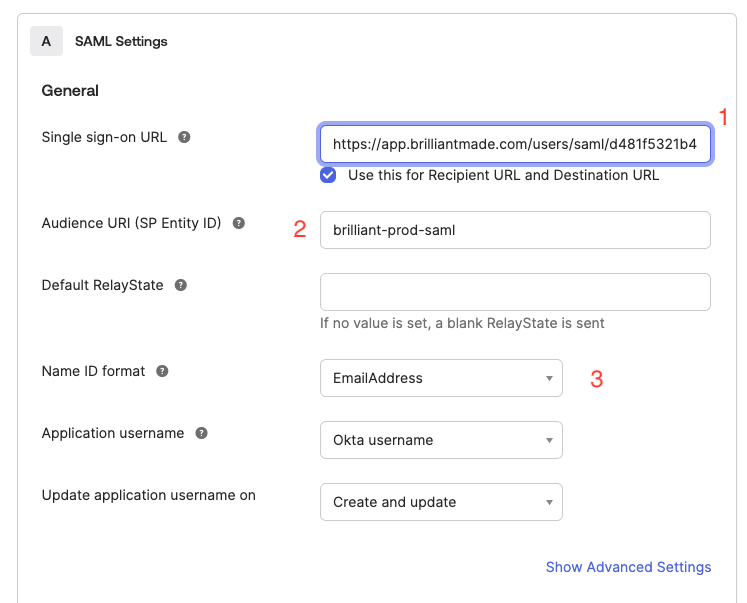
1 copy the Sign On URL to your IDP and
2 enter an Identifier; this can be any value as long as it matches what is entered in your IDP (Figure 2).
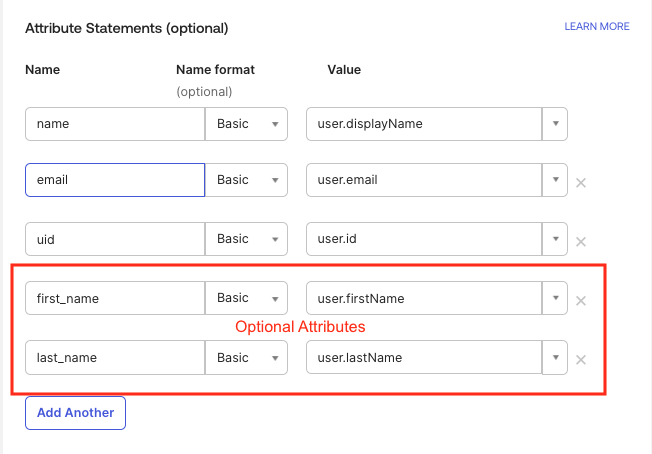
3 Ensure the Name ID Format is set to either EmailAddress or unspecified. Brilliant requires the following additional user attributes:
Full Name
Email address
Unique user ID
These should be mapped to name, email and uid fields as shown in Figure 3.
If the Display Name value in Okta is formatted as "Last Name, First Name" then First Name and Last Name attributes can be substituted and will be concatenated when the assertion is sent. These fields shown in Figure 3 are optional.
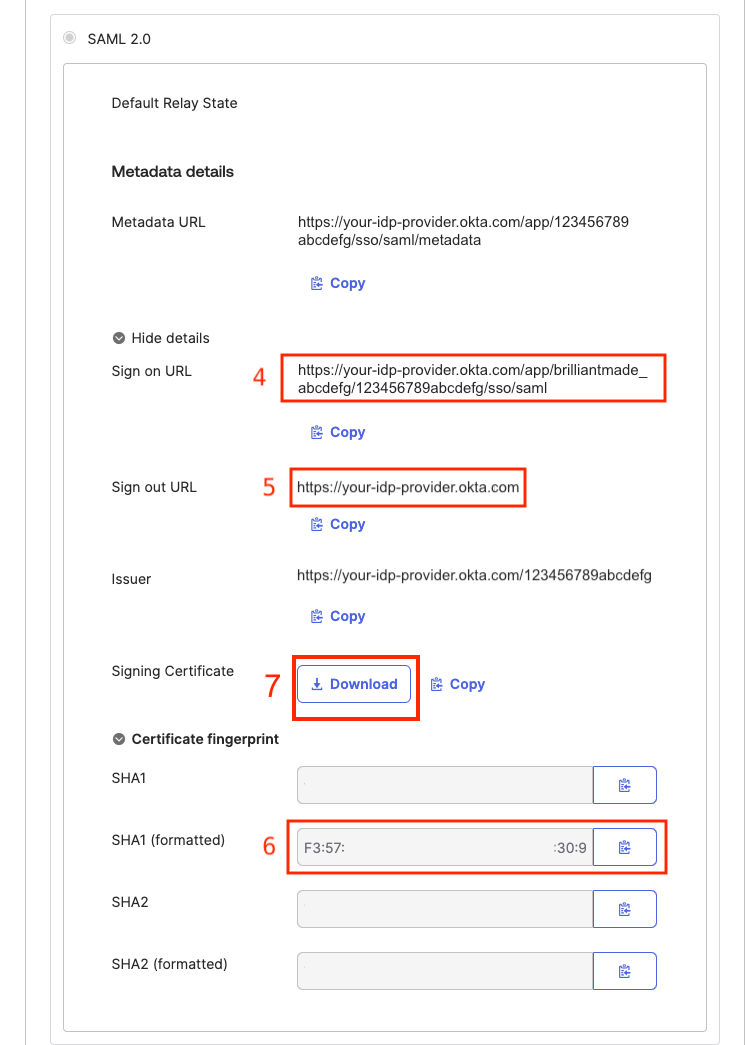
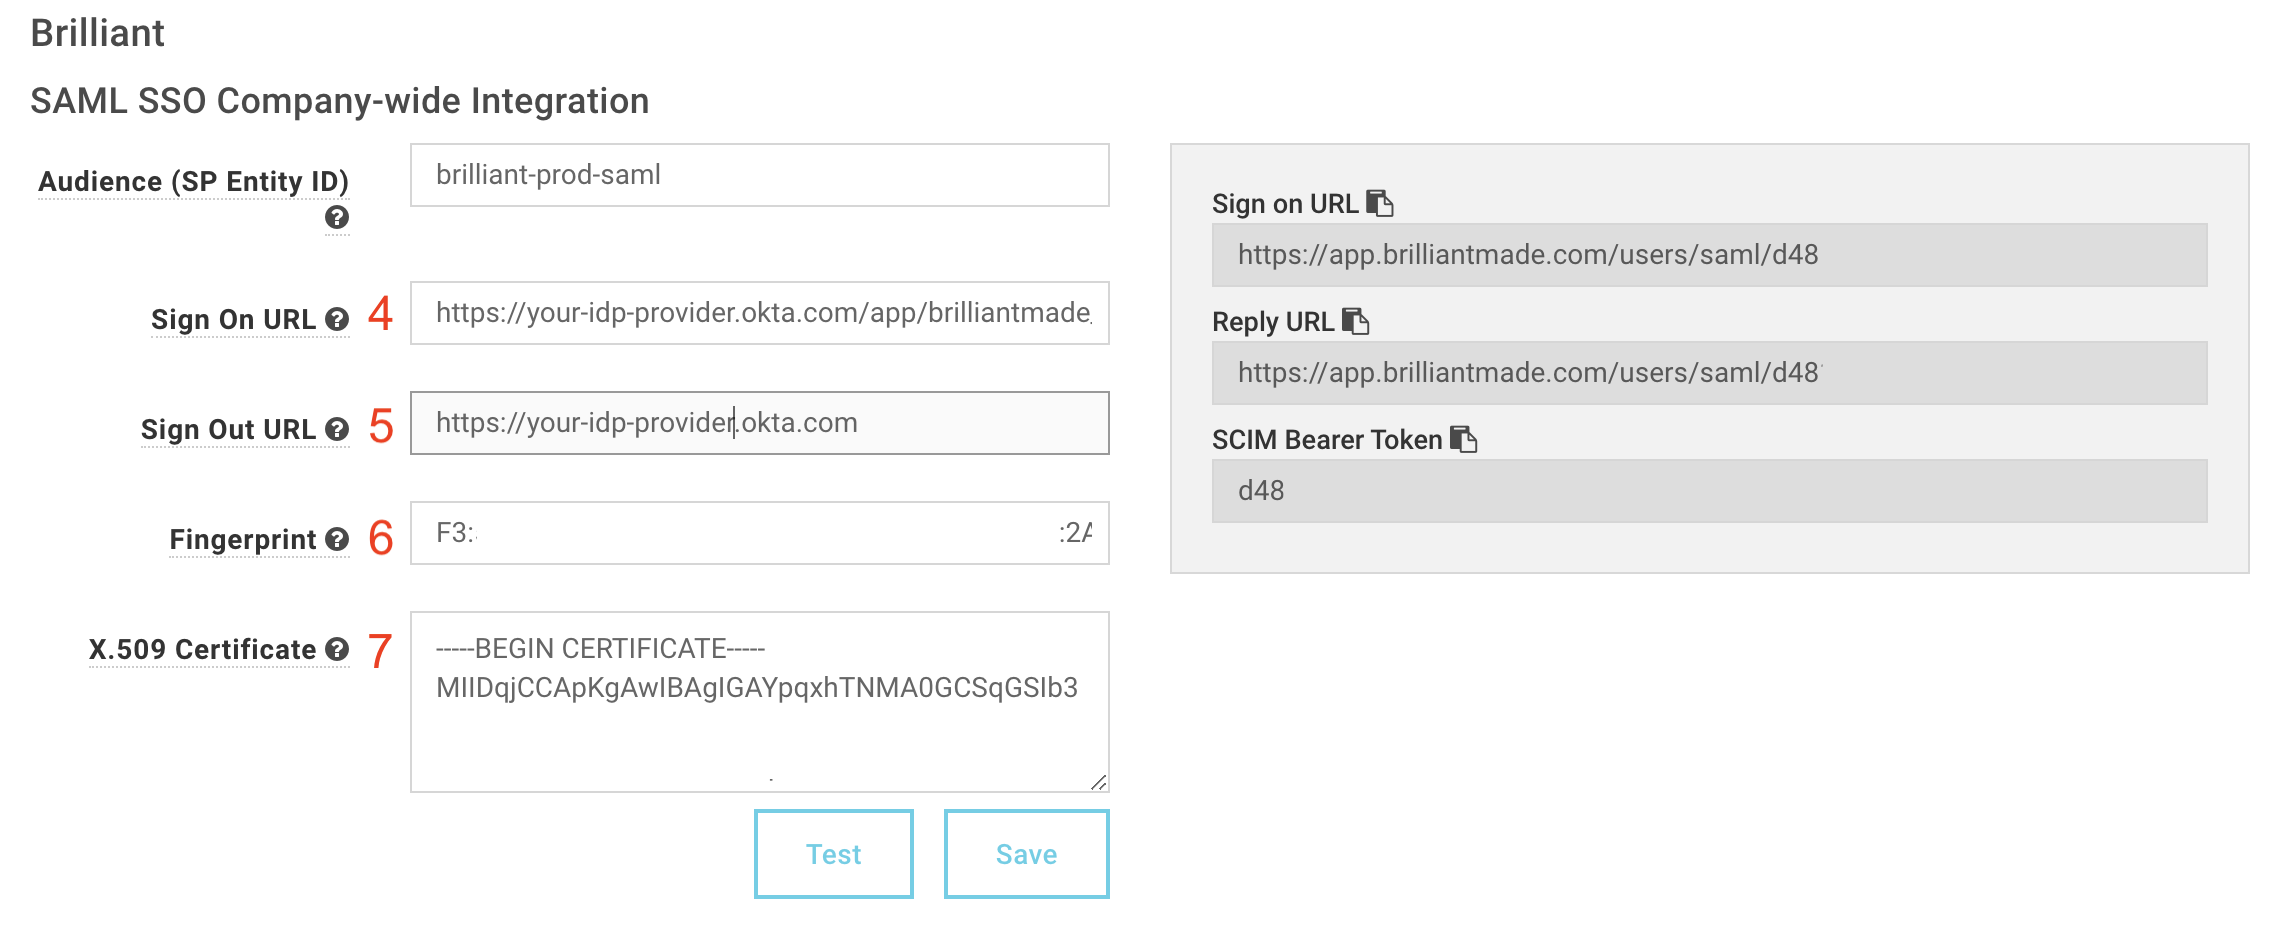
Save your SAML application in your IDP and then view the application details as in Figure 4. From your IDP, copy and paste into the Brilliant configuration fields (Figure 5) the:
4 Login URL
5 Logout URL
6 SHA1 formatted fingerprint
7 The signing certificate
The signing cert must be the full certificate, including -----BEGIN CERTIFICATE----- & -----END CERTIFICATE----- values.
Figure 1
Figure 2
Figure 3
Figure 4
Figure 5
Questions or Issues?
Email [email protected] for anything related to our SSO integrations.
