Rippling New Hire/Anniversary Automation Setup
The New Hire/Anniversary Automation Setup is available to all Rippling Admin users. Follow the documentation below to create your Workflow in your Rippling Workflow Studio and connect it to your Brilliant Preferred Gift Campaign. Additionally, you can view Rippling's Workflow Studio Getting Started Guide to get more information about Rippling workflows.
Custom Email Address
As part of the automation setup, Brilliant will create a custom email address specifically for your Rippling workflow to utilize. The workflow setup below requires this email address. You can either wait for the Brilliant team to provide you with this custom email address or you can complete the steps below without the email address and update the workflow later once the email is provided to you.
Rippling Workflow Setup
In order for Brilliant to receive employee information for gifting, you will need to build workflows in Rippling to send the necessary information. Building these workflows yourself allows you to have direct control over various gifting parameters, such as when you would like to send the gifts, which employee types the gift should be sent to, etc.
Log in to Rippling as with an admin account, then navigate to Tools > Workflow Studio.
Click Create Workflow.
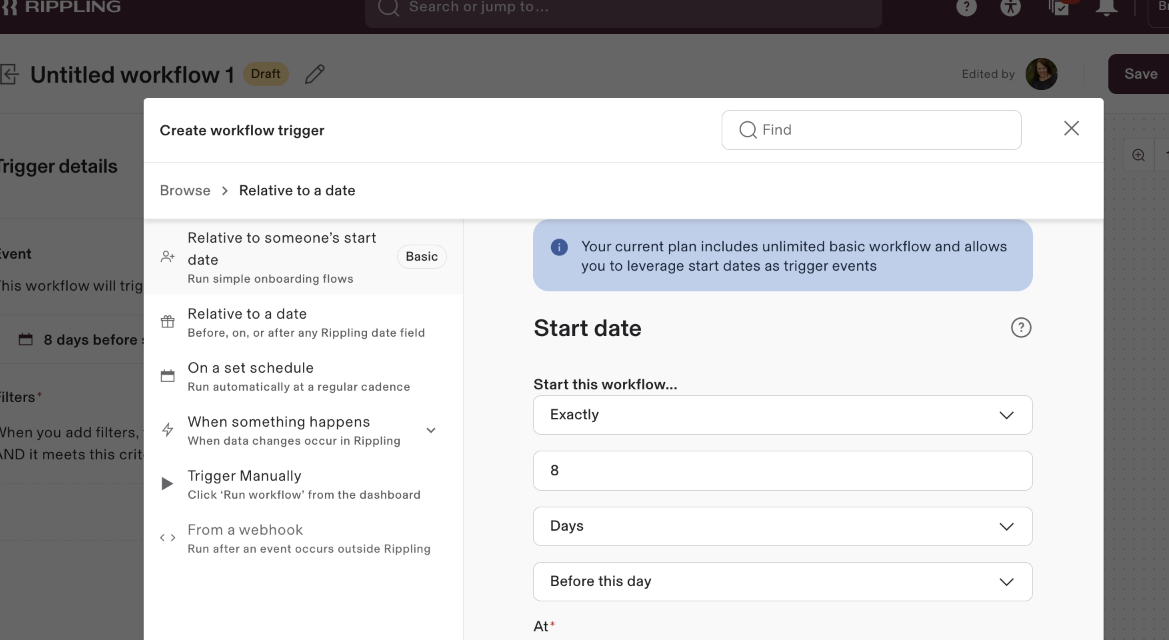
For the workflow trigger, choose Relative to someone's start date. The settings you configure in this trigger will correspond to how many days before/after a person's start date you would like them to receive their Preferred Gift Campaign email.
If you are setting up this workflow to automate new hire gifts, we recommend you set the workflow to trigger on or after an employee's start date to ensure that all required information (such as employee email) is present at the time that the workflow runs.
If you are setting up this workflow to automate anniversary gifts, you can set the workflow to trigger a number of days after an employee's start date corresponding with the anniversary year you are sending for. For example, if you are setting up a workflow to send gifts to employees on their 1 year anniversary, you can set the workflow to trigger 365 days after their start date.
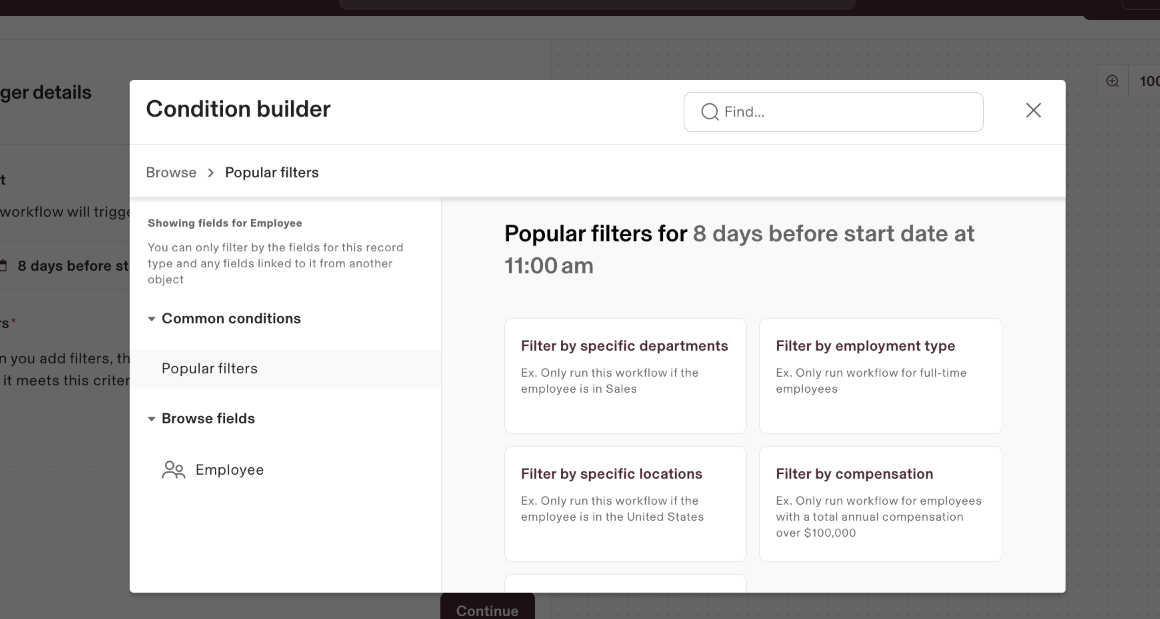
Optionally, add any filters to the workflow trigger to define which employees will be gifted. With the workflow trigger selected, use the Trigger Details section on the left side of the page to add filters. For example, you could add a filter for Employee Type to include only full-time employees in the gifting process.
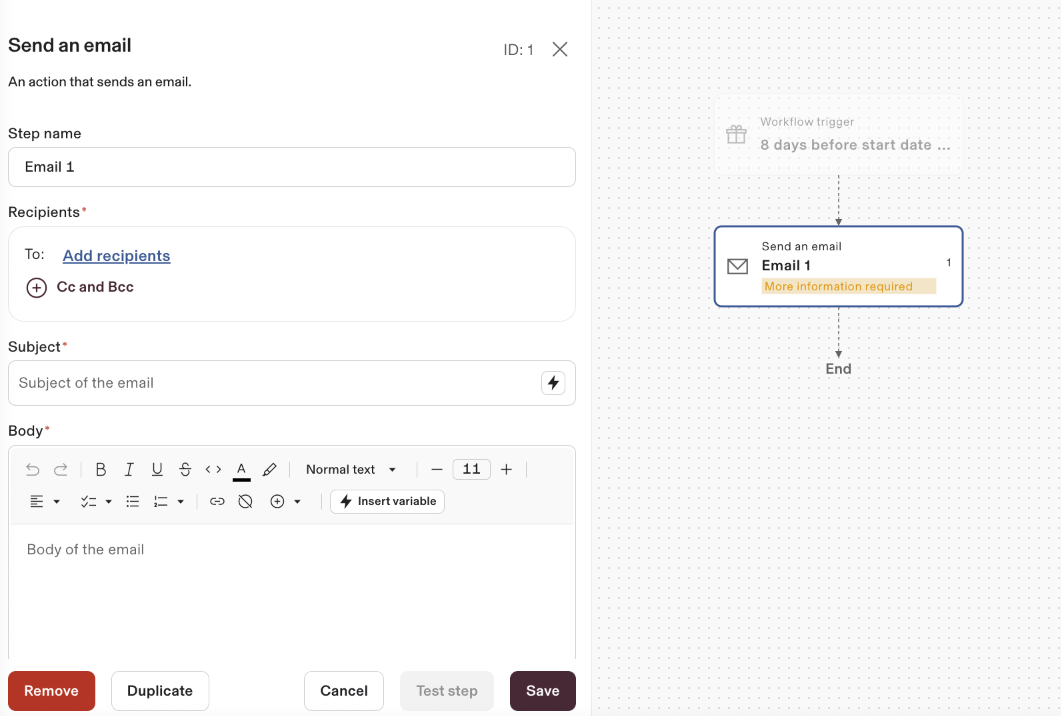
After saving the workflow trigger, drag a Send an Email action from the left side of the screen into the workflow.
Select the email action in the workflow, then configure the email with the below settings. Where applicable, please use the insert variables button (lightning bolt icon) to replace the text in square brackets with dynamic variables:
Set the recipient of the email to the custom email address provided to you by Brilliant.
Set the email subject as follows (replace [Your Company Name] with your company name and [Employee Name] with its corresponding variable):
For a New Hire workflow, set the Subject of the email to: [Your company name] - New Hire - [employee name]
For an Anniversary workflow, set the Subject of the email to: [Your company name] - Year X Anniversary - [employee name] (where X is the anniversary year, for example Company - Year 1 Anniversary - Test Employee)
Set the body of the email to include each of the following bullet points (please use this exact format and replace sections indicated by square brackets with their corresponding variables):
Employee Name: [employee name here]
Employee Email: [employee email address here]
Employee Start Date: [employee start date here]
Save the workflow - please keep the workflow inactive until the Brilliant team confirms that the automation build out is complete and the Preferred Gift Campaigns are connected.
Brilliant Workflow Setup
Once you have completed the Rippling Workflow Setup, email your Brilliant Implementation contact to confirm that setup is complete. Our team will complete the Automation build on your Brilliant storefront and connect the relevant Preferred Gift Campaigns to be automated. We will monitor your Integration closely for any errors or blockers and will be available to answer questions or make requested updates for the duration of your Automation.