Deel
This guide assumes you have already communicated with Brilliant to set up a Deel automation for your account.
Note: The Deel user setting up this configuration must have one of these roles:
Org Admin
IT Developer Admin
Deel Set Up Instructions:
From the Deel home page, select the More icon and Apps icon. Click on the Developer Center button.
There will be an option to select a Personal Token or Organization Token.
We suggest using an Organization Token as a Personal Token will expire if the associated user leaves the company.
After selecting the token type, click the Generate Token button.
A popup will appear with the scope options for the API access token
Ensure the scope people:read is selected with a checkmark.
After selecting the correct scope, click the Generate button.
Important: copy the token after it is generated and store it. You will not be able to view it again and will need it in a following step to connect to Brilliant.
Brilliant Set Up Instructions:
Log in to Brilliant, then navigate to the "Automations" page of the store you wish to connect to the automation via Storefront -> Your Store to Connect -> Automations.
Find the "Deel" automation, then click "Connect."
You will be asked for your account information for Deel. Please click "Save" after entering the following:
API token generated from the above Deel set up
Fill out the following fields
Preferred Gift Campaign: This is the Preferred Gift Campaign you want to add new hires to. This is for the New Hire automation only and will not appear for anniversary automations.
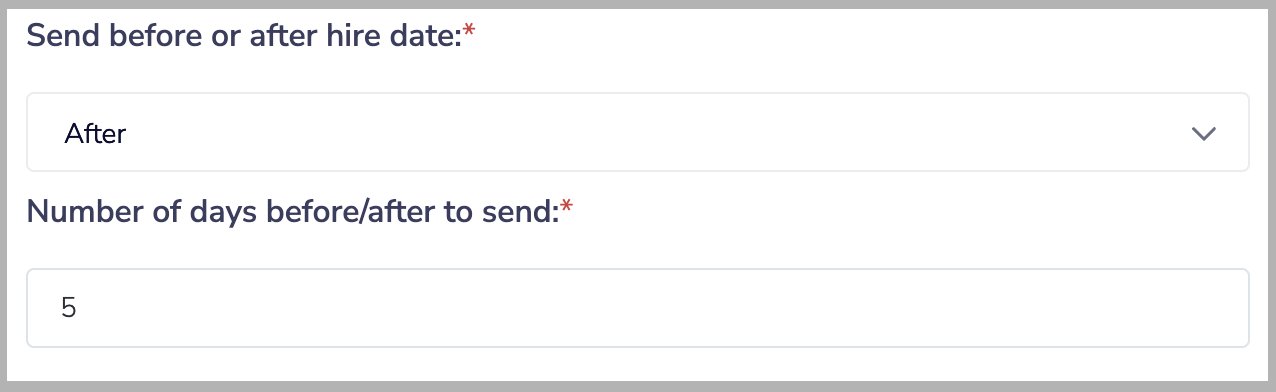
Send before or after hire date: If you would like to send gifts to new hires a specified number of days before or after their hire date rather than exactly on their hire date, the automation can be configured to do so. This setting determines if the Preferred Gift will be sent before an employee's hire date or after their hire date. If you want to send the Preferred Gift on their exact hire date, you can choose either of these options.
Number of days before/after to send: If you chose to send the Preferred Gift before an employee's hire date, this setting determines how many days before their hire date the Preferred Gift will be sent. If you chose to send the gift after their hire date, this determines how many days after. If you want to send the gift the day an employee is hired, you can leave this setting at 0. For example, if you wanted to send a Preferred Gift to new hires 5 days after their start date, the end result for these settings would look like this:
Hour of day (CST) to send: The hour of the day in CST the automation will pull your Deel report and send gifts.
After clicking "Finish," you can close out of the configuration set up.