Bonusly Integration Set Up
Set Up a Custom Reward for Brilliant Storefront Gift Cards in Bonusly
The Brilliant x Bonusly Integration uses the Custom Reward feature in Bonusly to issue corresponding gift cards in your Brilliant Storefront to allow employees to redeem their Brilliant gift cards from your existing gift inventory. When setting up the Custom Reward, you can give the reward a unique name. Under the Catalog Settings of the Custom Reward, please also set the Fulfillment Partner to Brilliant. The integration will only search for reward redemptions whose Fulfillment Partner matches this. Your team can choose how many points in Bonusly can be redeemed for a Brilliant gift card of corresponding points or dollar value. We recommend creating a single Custom Reward with multiple redemption amounts rather than creating multiple separate Custom Rewards with their own distinct redemption amounts.
For example, your Custom Reward set up could be named ‘YourCompanyName Swag Storefront Gift Card’ with redemption options of 50 points for $50, 100 points for $100, etc. The Brilliant team needs to know the Custom Reward name and how the redemption amounts in Bonusly will correspond with the dollar or points amounts in your Brilliant Storefront. You can send this information to your Brilliant implementation team directly via email to get the ball rolling on your set up.
For more information on creating Custom Rewards in Bonusly, see their guide here.
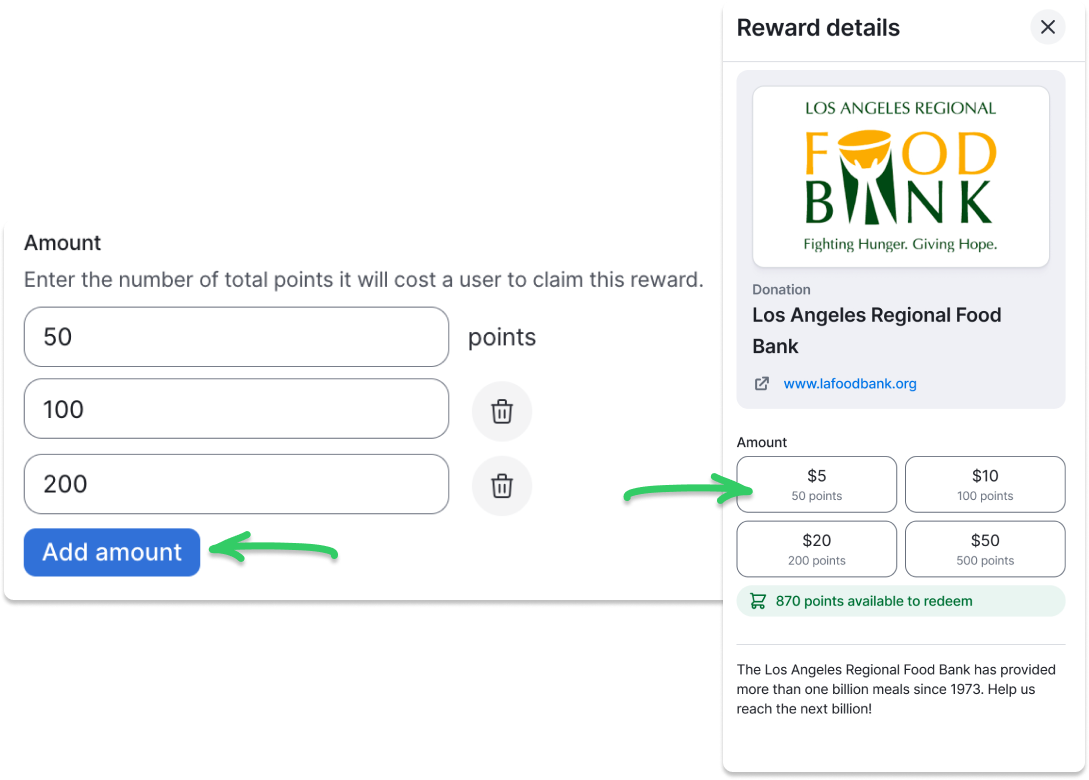
Sample from Bonusly of setting up a Custom Reward with multiple redemption amounts
Connect Bonusly and Brilliant
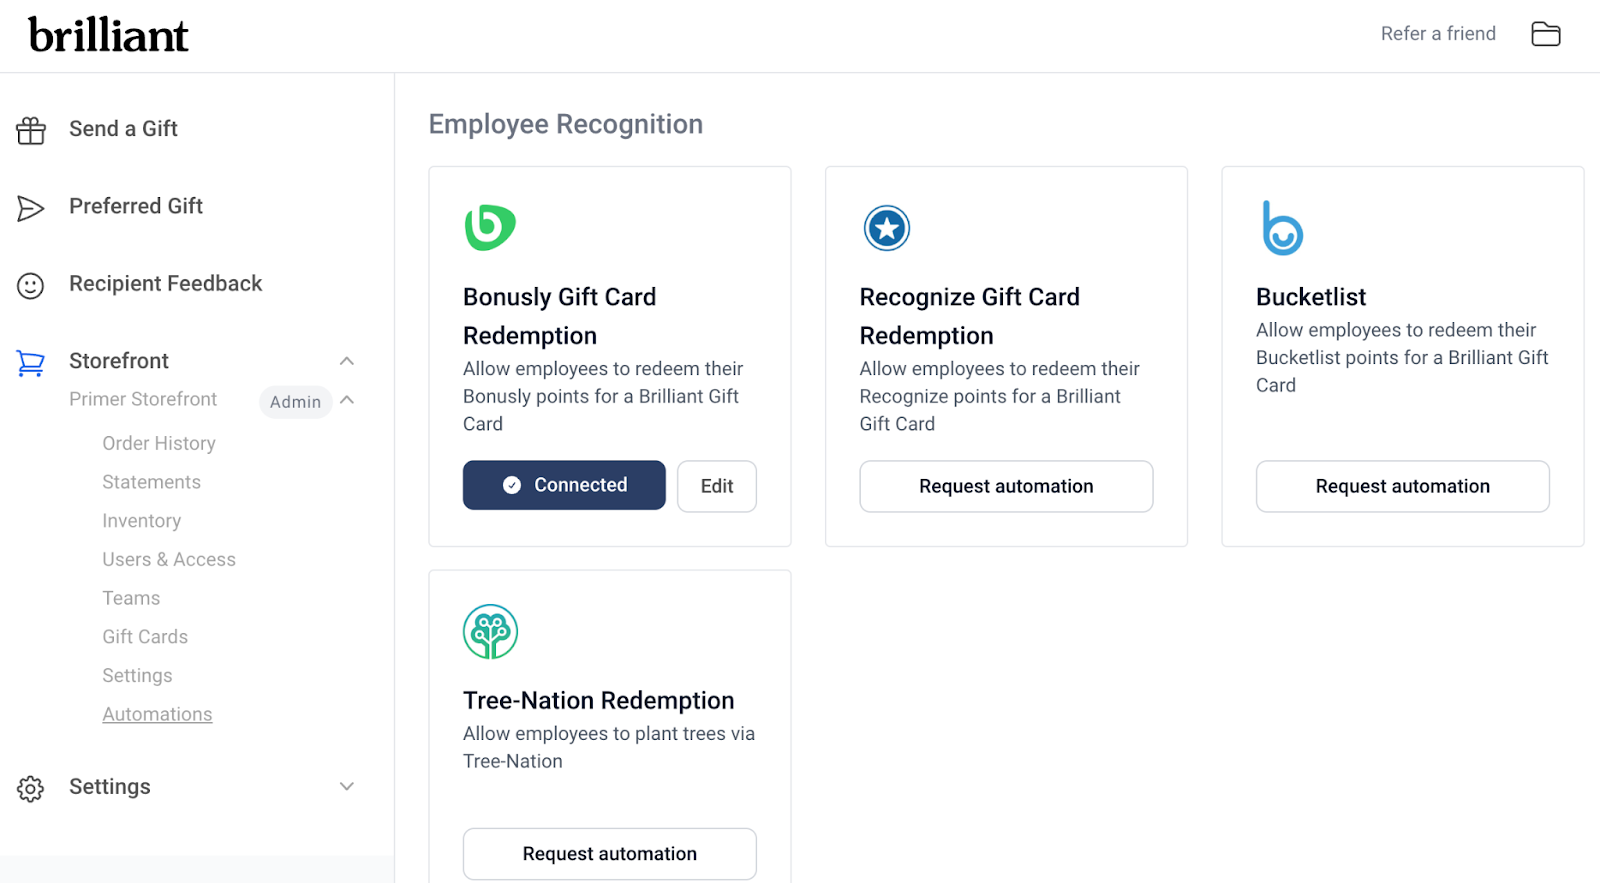
To connect Bonusly to Brilliant, you’ll need to generate a new API Access Token from Bonusly following the steps outlined here. Once your Brilliant team has activated the integration in our system, any user with admin access in Brilliant will be able to the enter the API Access Token into Brilliant by logging into their Brilliant account and navigating to Storefront > find the Storefront name you’re using for the integration > expand the Storefront Admin panel and click Automations > scroll down to the Employee Recognition section and click Connect in the Bonusly Gift Card Redemption tile.
Clicking Connect will open the Authentication page. The ‘Inviting User ID’ on this page is the user who will show in the email to users receiving a gift card as having sent the gift card. Your Brilliant implementation team will help provide the correct User ID, or we are happy to set up the connection on our side with your provided Inviting User and the API Access Token from Bonusly.
The Brilliant Storefront set up for your integration will default in the first drop down list and you’ll add your Bonusly instance in the second drop down. This will open the ‘Create a new authentication’ window where you can enter the API Access Token into the API Key section.
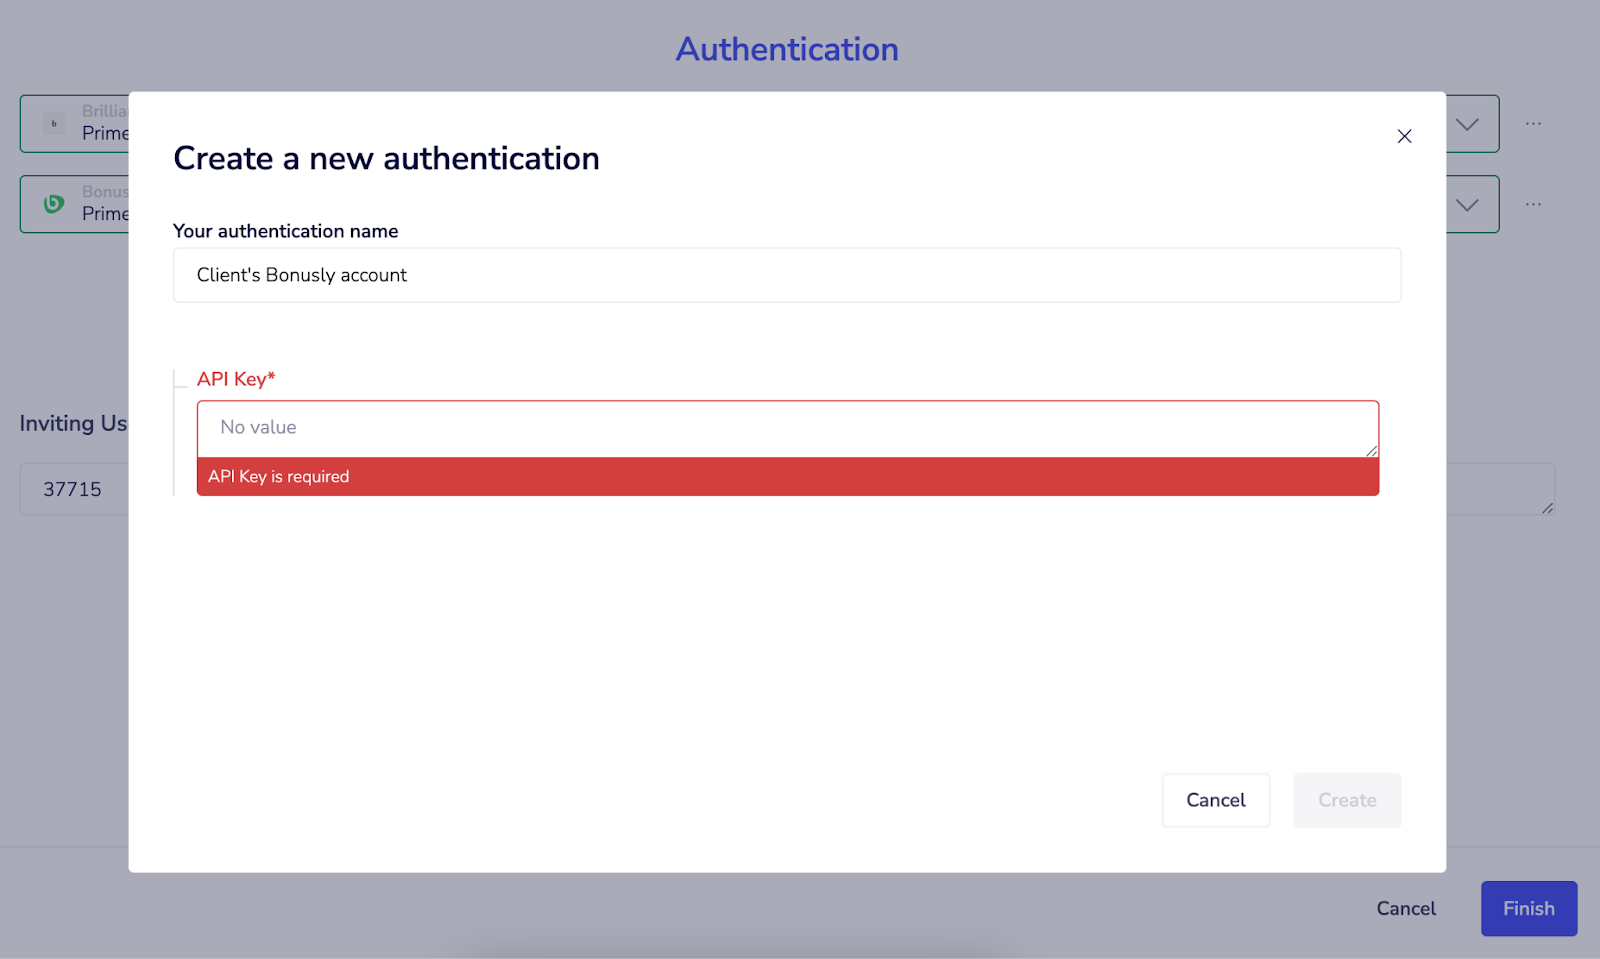
Clicking Create will close the panel and enter the API keys. Clicking Finish from the Authentication window will establish the connection between the two systems, and you’ll now see the Bonusly tile on the Automations page in your Brilliant account show as Connected. The integration is now live!
Marking a Custom Reward as Approved
Brilliant can only fulfill a Bonusly Custom Reward when it is marked as Approved, a manual step a Bonusly admin will need to take before a gift card can be issued in Brilliant. For information on how to approve Custom Rewards in Bonusly, see their help guide here.