Marketo Application Setup
This guide assumes you have already communicated with Brilliant to enable the Marketo integration for your account. Please note your Marketo instance must have webhook functionality enabled in order to integrate with Brilliant. If you are unsure if you have access to this Marketo features, please contact your Adobe Account Manager. You also must have admin access to your Marketo instance in order to complete the setup process below.
As part of the Brilliant x Marketo integration process, you must set up your Marketo instance to send lead data to Brilliant and to receive gift data from Brilliant via custom fields. You can configure Marketo to use the Brilliant gift data as you wish.
Marketo Initial Setup
In order for Brilliant to connect to your Marketo instance, please follow the steps below to create an integration system user and set up API access. You will also need to create some custom fields on the Marketo Person object. After following the initial setup for Marketo and connecting Brilliant, you will need to go back into Marketo to create a webhook.
API User and Setup
To set up API access, we recommend creating an integration system user with a custom role for limited access to the necessary information. You will also need to find your client ID, client secret, and REST endpoint within Marketo.
Create a Custom Role
Go to the Admin page of Marketo.
Under the Security section on the left side of the page, click on Users & Roles.
Go to the Roles tab, then click New Role.
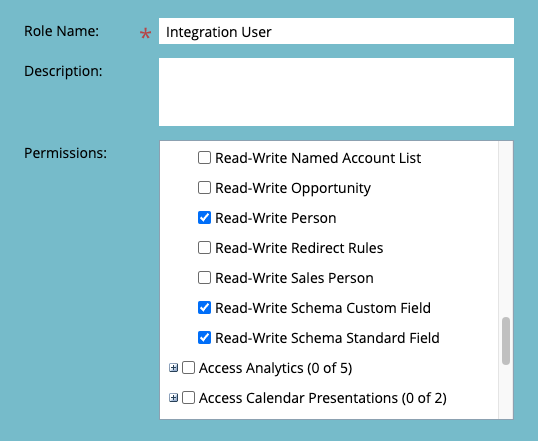
Name the role (e.g., "Integration User") and optionally provide a description.
In the Permissions field, expand the Access API section, then select Read-Write Person, Read-Write Schema Custom Field, and Read-Write Schema Standard Field.
Click Create.
Create a Custom User
The process of creating an API only user may vary slightly depending on your Adobe subscription. The steps below address how to create the user regardless of your subscription:
While still on the Admin page of Marketo in the Users & Roles section, go to the Users tab.
Click Invite New User OR Create API Only User (whichever one is visible depending on your Adobe subscription).
Enter a name and email for the user.
In the Roles field, select the custom role you created in the previous section.
Depending on your Adobe subscription, you may see an API Only checkbox under the Roles field. If you see this checkbox, make sure it is checked.
Save the user.
Get Client ID and Secret
On the Admin page of Marketo, go to the Integration section at the left side of the page and click LaunchPoint.
Click on the New button, then click New Service.
Enter a Display Name for the service (e.g. "Brilliant Integration") and select Custom for the Service dropdown.
Enter a Description (e.g. "Connection to Brilliant integration") and select the API Only user created previously.
Click Create.
Click View Details for the service you just created.
Copy the Client ID and Client Secret for later use in the integration setup.
Get Endpoint
On the Admin page of Marketo, go to the Integration section on the left and click on Web Services.
Navigate to REST API section, then find the Endpoint and copy everything before
/rest(e.g. if your endpoint ishttps://some-id-here.mktorest.com/rest, you would copyhttps://some-id-here.mktorest.com).This Endpoint will be used later in the integration setup process.
Create Custom Fields
You will need to create custom fields on the Person object in your Marketo instance. Brilliant will use these fields to send a unique gift redemption URL and status updates to each relevant person in your Marketo instance. To create the fields:
Go to Admin page of Marketo, then under the Database Management section on the left side of the page, click on Field Management.
By utilizing the New Custom Field button at the top, create the following custom fields:
Brilliant Gift Link:
Object: Person
Type: Url
Name: Brilliant Gift Link
API Name: brilliantGiftLink
Brilliant Gift Status:
Object: Person
Type: String
Name: Brilliant Gift Status
API Name: brilliantGiftStatus
Connect Brilliant
After you have followed the initial Marketo setup steps above, you are ready to integrate with Brilliant by following the steps below:
Login to Brilliant using your email address and password.
On the lefthand side of the page, navigate to the Automations page of the store you wish to connect the automation to via Storefront -> Your Store to Connect -> Automations.
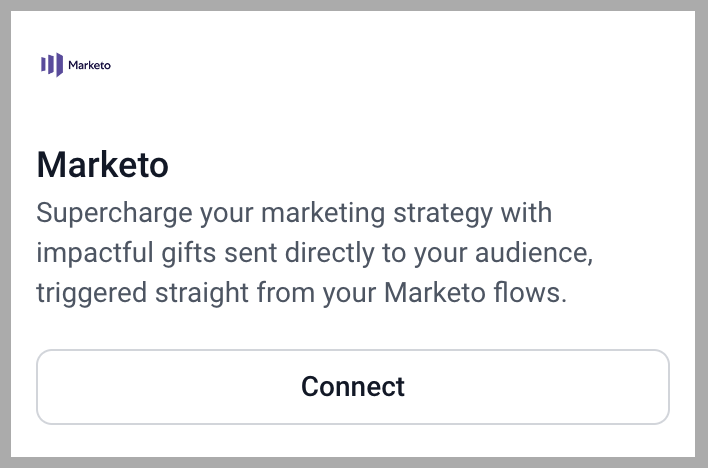
Find the Marketo integration and click Connect.
From here, you will be brought to a new tab where you can provide authentication and configure the integration.
You will be asked for your account information for both Brilliant and Marketo. After adding your accounts, click Next.
For Brilliant, the account will be added for you, so you can skip to adding your Marketo information.
For Marketo, you will need to provide your API endpoint domain, your client ID, and your client secret obtained earlier. For the API endpoint domain, please make sure
/restis not included at the end of the URL.
You will now be asked for some configuration values for your Marketo integration. After selecting the proper options for your use case, click Next.
For the Preferred Gift Campaign dropdown, select the Preferred Gift Campaign you want to add Marketo leads to.
If you would like to send emails containing the gift link through Brilliant's email system, check the box under Send Gift Email via Brilliant. If you are instead sending emails through your own system with the gift links that are synced back to your Marketo instance, leave the box unchecked.
On the Webhook URL screen, you will see a URL labeled Marketo Webhook URL. Copy this URL, as you will need it when setting up the Marketo webhook. Then click Finish.
Marketo Webhook Setup
Now that your Marketo integration is connected, you will need to setup a webhook in Marketo to send lead information to Brilliant. The webhook will be called via a trigger campaign.
Create Webhook
Before creating the webhook, please make sure you have the webhook URL obtained in the previous section.
Go to Admin page of Marketo, then click on Webhooks on the left side of the page.
Click on New Webhook.
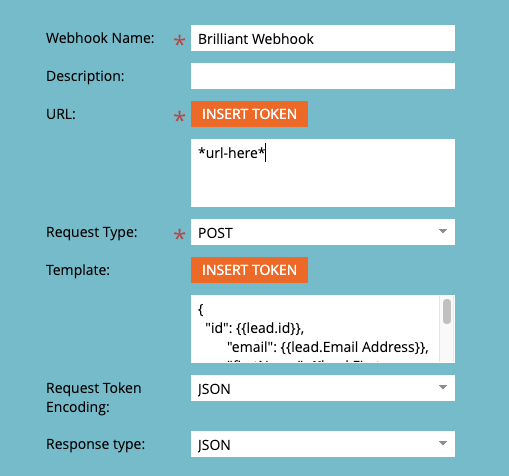
Give webhook a name such as Brilliant Webhook.
Using the URL obtained in the Connect Brilliant section above, paste the URL into the URL text field.
Set the Request Type to POST.
Paste the following text into the template text field:
{
    "id": {{lead.id}},
    "email": {{lead.Email Address}},
    "firstName": {{lead.First Name}},
    "lastName": {{lead.Last Name}}
}
Set Request Token encoding field to JSON.
Set Response Type to JSON.
Click Create.
After creating the webhook, select the webhook you just created on the right side of the page. Then, click Edit next to the Custom Headers section.
Click the Add button.
For header column, put Content-Type. For value column, put application/json.
Click Save.
Use the Webhook
Your Brilliant webhook is now created, but you will still need to add this webhook to a smart campaign. Please note webhooks can only be used in trigger-type smart campaigns.
Create or go to a smart campaign you want to use with Brilliant gifting (must be a trigger campaign).
In the campaign's page, go to the Flow tab.
Drag in the Call Webhook action from the right side of page to the step in the flow when you want to add the lead to your Brilliant Preferred Gift Campaign.
Using the Webhook dropdown in the action, select the webhook created in the previous steps.
Your Brilliant x Marketo connection is now complete! When your smart campaign is triggered, it will call the Brilliant webhook as set up in your flow steps. When the webhook is called, the lead that triggered the flow will be added to a Preferred Gift Campaign. This lead will then have their Brilliant Gift Link populated with their unique gift redemption URL. Please note that there may be a delay between the time the webhook is called and the time a lead's Brilliant Gift Link is updated.


