Configuring SAML SCIM for Azure
Background
SCIM is a standard designed to make managing user identities in cloud-based applications and services easier. By configuring SCIM provisioning within your Identity Provider, you can easily control access to Brilliant by adding and removing users from your SCIM-enabled IdP applications and control access to Team Stores through IdP groups.
Configuring Single Sign-On Enterprise Application
Follow our guide to configure your Enterprise SSO application.
Provisioning Setup
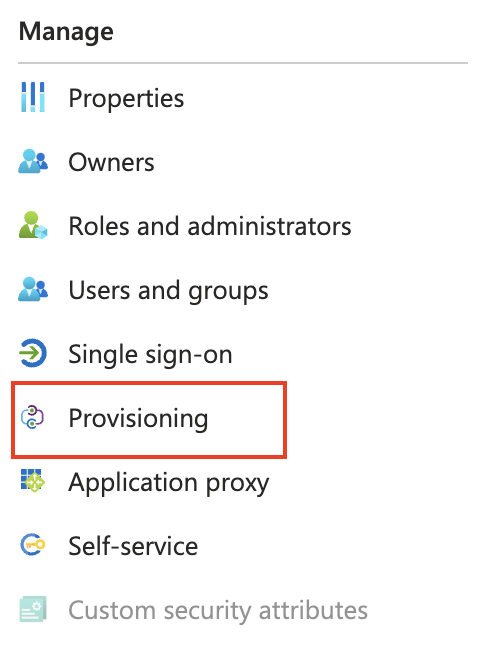
Click on Provisioning from the Manage menu
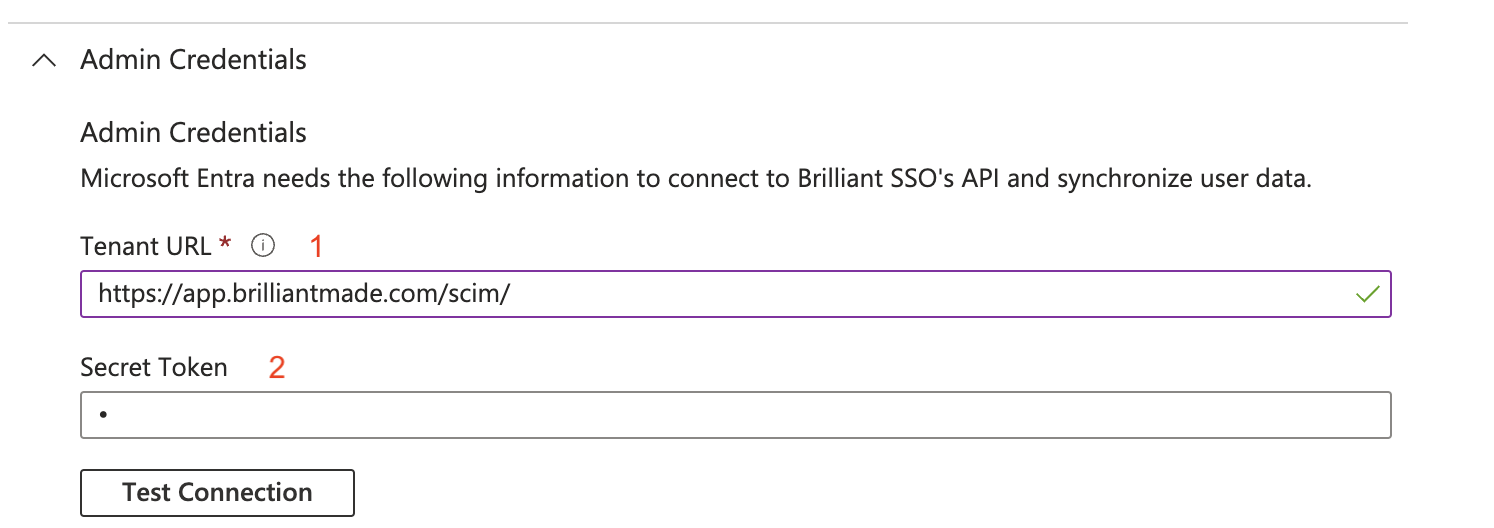
Admin Credentials
Enter https://app.brilliantmade.com/scim/ into the Tenant URL field
Enter your SCIM Bearer Token from the Brilliant Azure integration config page into the Secret Token field
Click Test Connection to test the connection.
Mappings
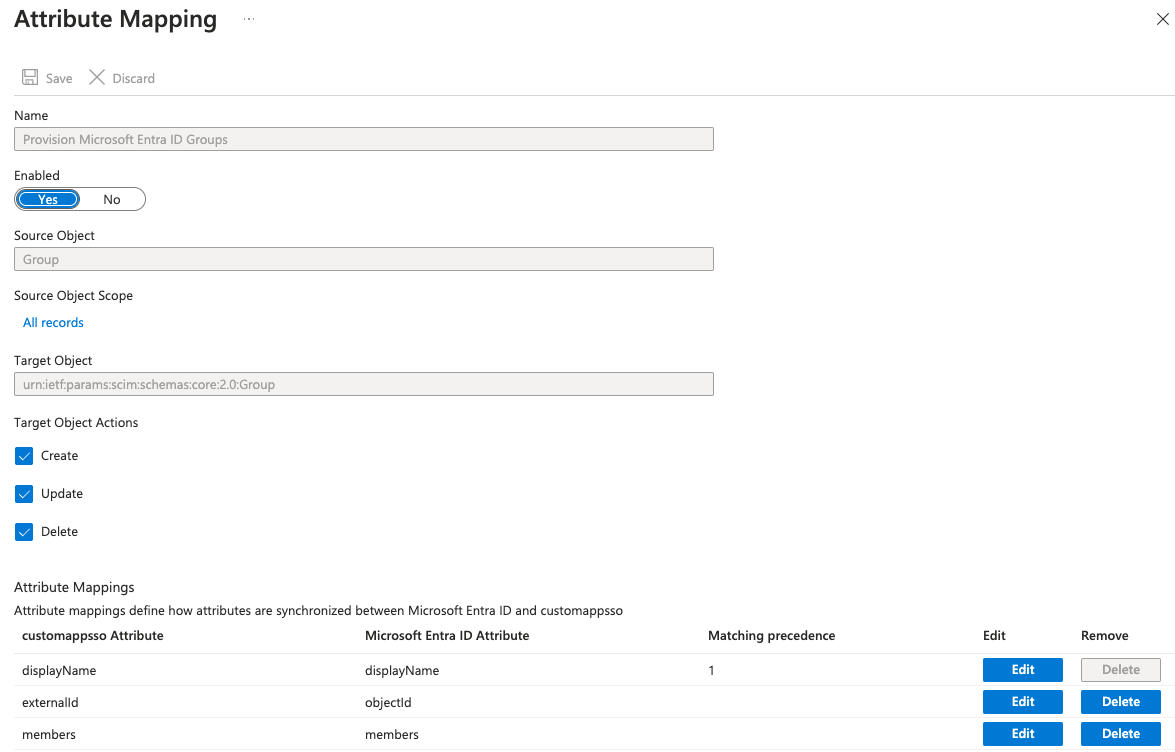
Group Mappings
Ensure the Group Mappings in the Mappings section are set as in the screenshot below:
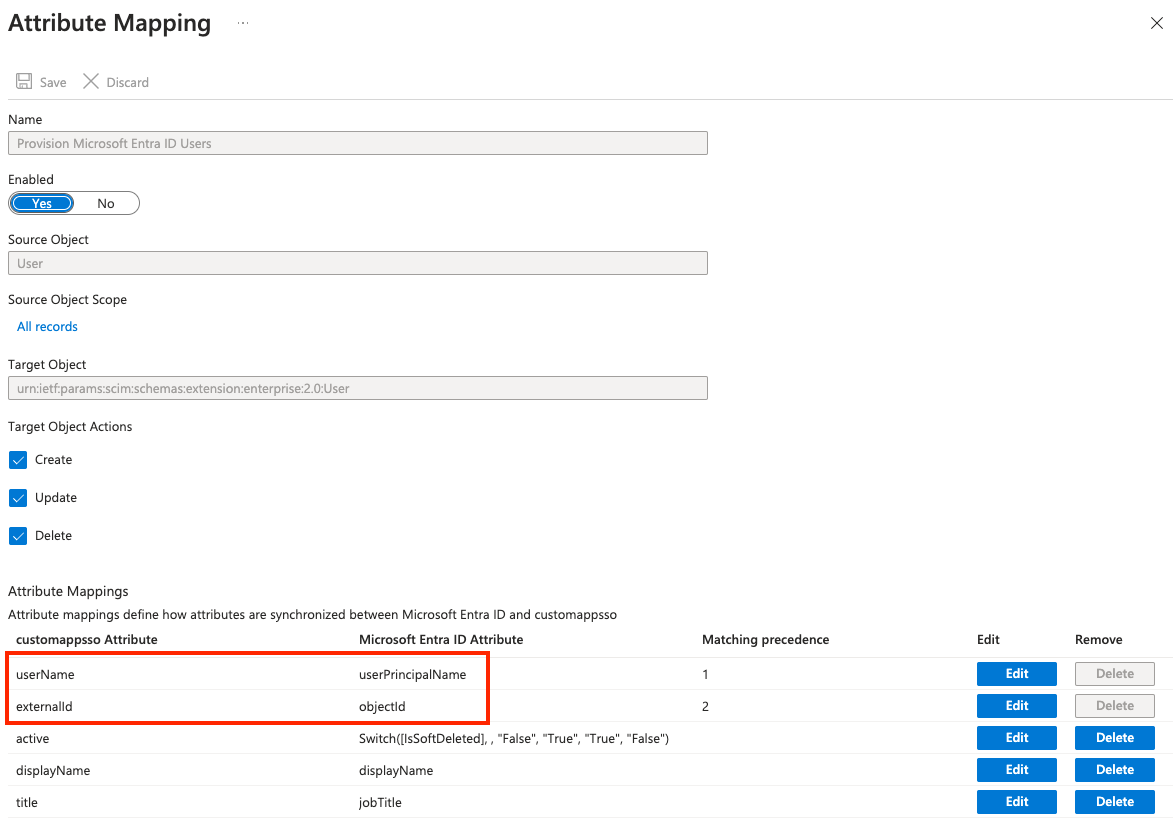
User Mappings
Ensure the User Mappings in the Mappings section are set as in the screenshot below:
Key fields are highlighted in this screenshot:
userName must be the user’s email address as this is a key field in the Brilliant system.
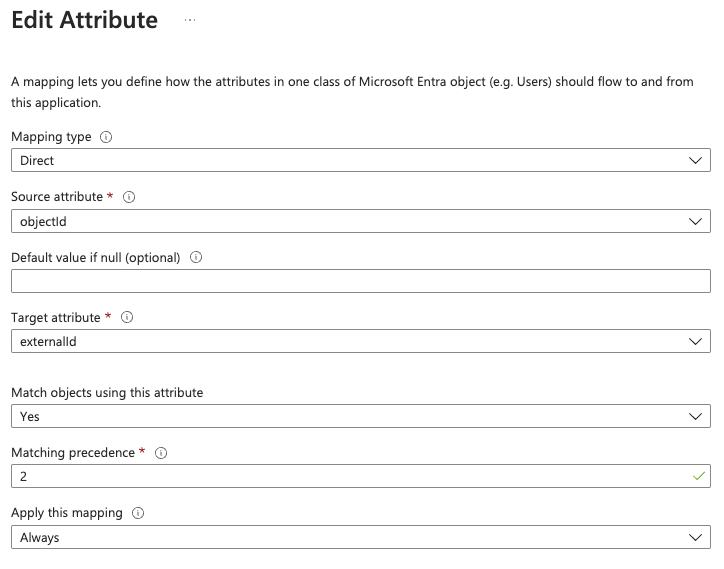
externalId may need to be set as a custom attribute in your mappings. In the below screenshot it is configured using the Azure/Entra objectId field, which is the user’s unique UUID.
Questions or Issues?
Email [email protected] for anything related to our SSO integrations.
