Application Setup
Before we begin, there are some assumptions being made. One, that you are a Company Manager and either you, or someone you are working closely with inside of your company is an Azure Administrator. Two, you have registered with Brilliant using your company email address.
After the above criteria has been established, the steps involved in setting up the Azure SSO application include:
Login to Brilliant using your email address and password
Navigate into your Settings -> Integrations -> Azure Integration General Settings (if you are logged into your Brilliant dashboard, you can click this hyperlink to navigate directly there)
In a separate browser, login to your Azure portal
From your Azure portal home directory, under Azure services, click “Enterprise Applications”. Click “New Application” and choose “Non-gallery application”.
Give your new application a name, for example “Brilliant SSO” and click the “Add” button at the bottom.
Next, in the left nav, click “Single sign-on” and choose SAML.
Enter the Bi-Directional links between your new Azure SAML Application and your Brilliant Company-level Azure Integration. The following screenshots should help you with this.

On the Brilliant side, you should see something like this:
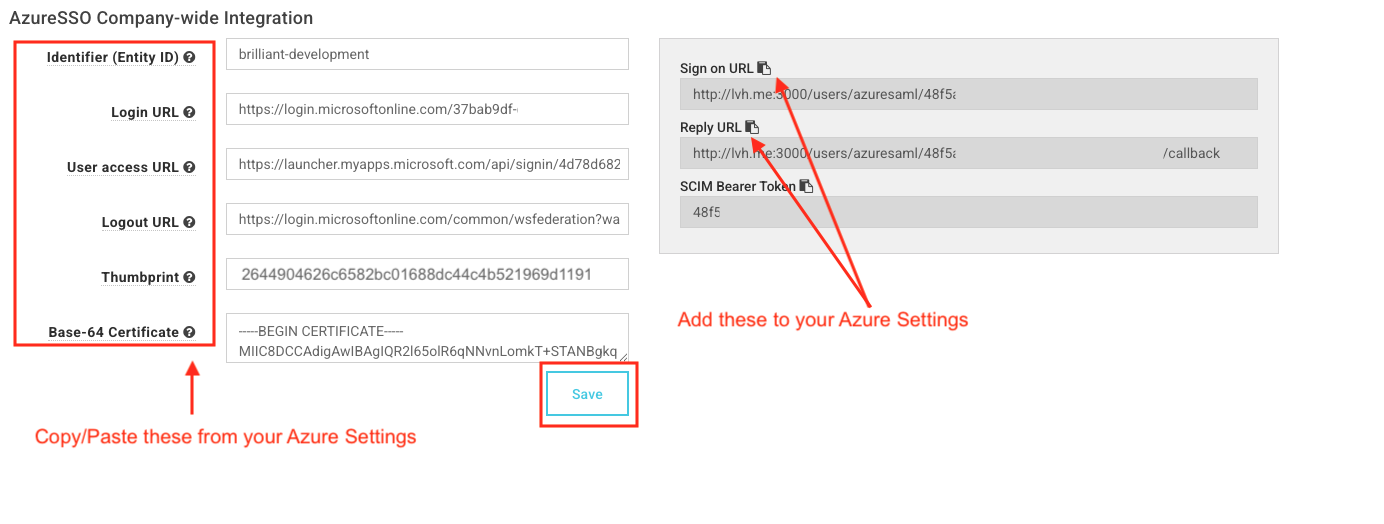
The User access URL value is found in the Properties page for the Enterprise Application.

Once these settings are in place in both Azure Portal and inside the Brilliant Azure Integration screen, you can test the integration using the Test button built into Azure. If the test is successful, you will be logged into Brilliant and see your store or the Brilliant dashboard.

Note on User Display Name Formatting:
If your user names are formatted Last Name, First Name, please ensure that the name value is not set in the User Attributes & Claims section of the SSO configuration.
Questions or Issues?
Email [email protected] for anything related to our SSO integrations